Free Site Encryption With Let’s Encrypt
This is part of a series on hosting a website on the Raspberry Pi. Click the Raspberry Pi Webserver in the Blog Series to the right for the complete steps.
To start log into the Raspberry Pi terminal and install Certbot. Since we are using Apache, we will use the Certbot module.
sudo apt install python3-certbot-apache
Once that is complete, make sure you still have your two ports 80 and 443 still open.
Next, you will need to disable Cloudflare’s reverse proxy to allow Certobt to see your real IP address.
Head over and sign into Cloudflare. You should see your site displayed as active. Click it.

Then click DNS in the left hand menu, you should see your records appear. On the right side you should see a orange cloud with the words Proxied. Click Edit to the right.

Click the slider that appears to turn off the proxy.

The icons turn gray and DNS only should appear.

Click Save. Do this with each of the records you have,
Let’s run the install Certbot module.
certbot --apache
Certbot will present you with several questions: email address, Terms of Service, whether you want to share you email with Electronic Frontier Foundation. Provide your answers.
Certbot will give you a list of website installed in Apache. Select the number corresponding to the domain you want to protect, and then press enter. If for example, you see both example.com and www.example.com, enter both number separated by commas or spaces.
After clicking enter, Certbot will create everything for you and place the items in the correct locations. One item to note is that, as with all certificates they will expire. Please run certbot renew to renew your certificates before they expire. Look under the IMPORTANT NOTES displayed in your terminal for the expiry date.
Now let’s head back to Cloudflare to turn back on the proxies. Basically, the same steps as above except you will be turning the icons from gray to orange.
From this:

To this:

Remember to click Save after making a change to each record.
Next, you will turn on the encryption.
In the left hand menu click SSL/TLS

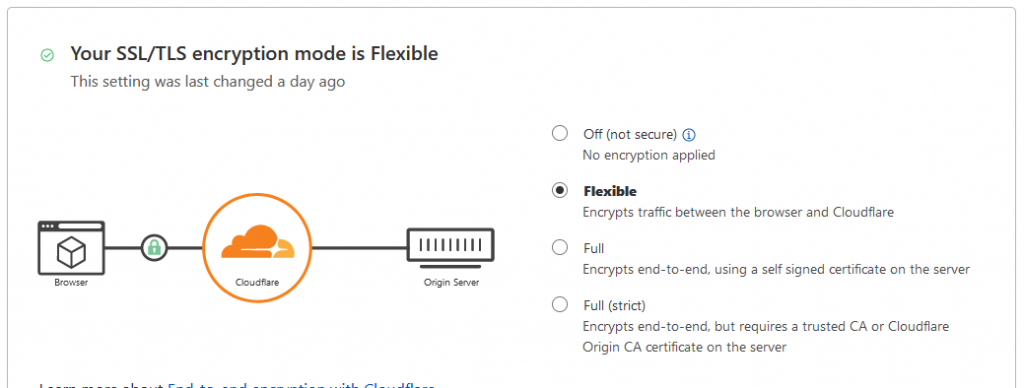
In the overview you should see this:

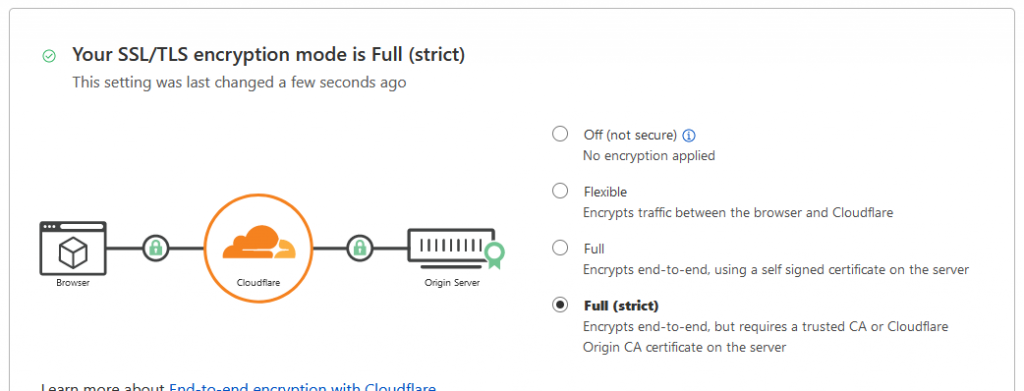
Select Full (strict) to have end to end encryption.

That’s it, your website should have end to end protection.
Close your browser or use private browsing, enter your domain name and after it loads, you should see the pad lock as below and hovering over it display this text.

I hope you enjoyed this series, it was a lot of work getting to this point. Now go fill that website with great content!
Share this content:
Leave a Reply